Oven Fried Chicken

Oven fried chicken was a normal staple in our house growing up. I always looked forward to it! My mom used to bread the chicken in cornflakes with a little lemon juice, and it had the most amazing crunch, and tangy taste.
20140805-092718-34038625.jpg

I decided it was time to carry this type of main dish into my regular cooking routine.

I have been finding my recipe inspiration on Pinterest. This one came from another blogger, moneysavingmom.com. But I modified her original recipe to this:

Oven Fried Chicken
3lbs skin on chicken pieces, rinsed and patted dry
(If you prefer, you can also buy a whole chicken and cut it yourself)
1/2 cup melted butter
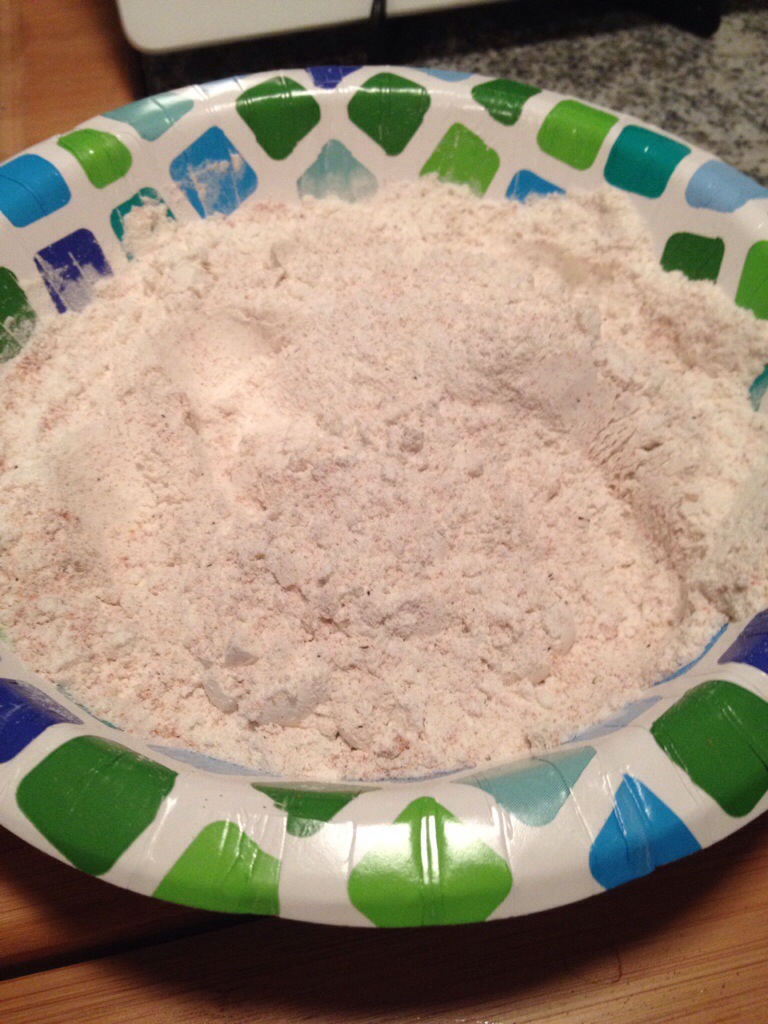
1/3 cup flour, heaping
1 teaspoon salt
1/4 sparing teaspoon pepper
1 teaspoon paprika
Lemon juice (optional)

Preheat the oven to 400 degrees.

Mix together flour, salt, pepper and paprika. Dip chicken pieces in melted butter and then coat evenly with flour mixture.

20140805-094016-34816028.jpg

20140805-094015-34815238.jpg

20140805-094017-34817500.jpg

20140805-094016-34816755.jpg

20140805-094014-34814519.jpg
Place in a single layer on a greased shallow baking pan (skin side down – if you’ve left the skin on). I sprinkled a little lemon juice on for tangy-ness before it went in the oven.

20140805-094224-34944657.jpg

Bake 400 degrees for 30 minutes. Turn chicken pieces over and continue baking an additional 30 minutes.

This was what it looked like right before I flipped it. I also sprinkled a little more lemon juice in the bottom before returning it to the oven to finish.

20140805-094548-35148950.jpg

This was my final result:

20140805-094625-35185735.jpg

Enjoy!

Pizza!

I got my original recipe from The Mama’s Girls
Here is what I found worked the best:
I “grew” 2 Tbsp. of yeast in 2 1/2 cups of almost hot water (otherwise you kill the yeast)
2 Tbsp. Sugar
1 tsp. salt
7 cups of flour

I whisked the water mixture (with my stand mixer) into 3 cups of flour until it resembled something along the lines of pancake batter. I then switched to my kneading hook, added the sugar and salt, then the remaining flour.

Once the dough starts cleaning itself from the sides of the bowl take it out and kneed it by hand for 6 minutes.

Then let the dough rest for 10 minutes until it looks like this:

20140330-210502.jpg

We only used about half the dough, but probably could have gotten away with a quarter of the batch. We made personal pizzas. Roll the dough to about a quarter of an inch in thickness. Throw on your favorite toppings and bake at 400 for about 15 minutes. This is what they turned out like! Enjoy!
>

20140330-211341.jpg

20140330-211348.jpg

20140330-211359.jpg

My First Repurposed Crackle Piece

I turned this:
20140307-181335.jpg
Into this (my camera doesn’t do the detail justice):
20140307-181526.jpg

What you will need:
Two different colors of paint (I prefer the artist grade acrylics)
Gesso or Primer
Citrasolve (or another deglosser)
Metal Scraper
Paintbrushes
Crackle “Glaze” (I have had the most success with the Martha Stewart Weathered Crackle)

My personal choices in materials:
20140307-181712.jpg

I brushed the deglosser onto the wood. The directions said to wait 30 minutes to 24 hours. I started to scrape it off the body after the 30 minutes and it was extremely tacky yet. I waited about 20 hours to scrape the drawers and that was much more successful. After I finished scraping it down, I primed it with gesso as follows:
20140307-183541.jpg20140307-183548.jpg
Now for the fun part! Some color! I did a teal base coat like this:
20140307-184401.jpgAfter the base coat dries I painted on the crackle glaze, which goes on clear! After the glaze dried, I painted on the top coat!
20140307-184610.jpg I did a teal wash (watered down the teal) on the inside and outside of the drawers to tone down the original wood.
20140307-184828.jpgSo there you have it! My first repurposed piece of furniture! Hope this was knowledgable to you all!

Baked Mozzarella Sticks

I thought it might be nice to try baking mozzarella sticks instead of frying them. I think frying them may have had better results.

You will need, mozzarella string cheese, eggroll wrappers, and a little bit of water.

20140302-213338.jpg
Place the string cheese in the middle of the wrapper and fold the wrapper over the cheese.

20140302-213606.jpg
Fold the two sides over and start rolling the cheese up in the wrapper. When you get to the end, dip your fingers in the water and wet the tip. The tip will then stick to what you just rolled up.

20140302-213838.jpg
Place your rolls on a baking sheet for about 12-15 minutes at 350. They will be golden brown.

20140302-214211.jpg
We just ate them with some pasta sauce we had in the house.

Enjoy!

Pumpkin Chocolate Chip Cookies

20140220-001228.jpg

I’m always looking for a variation on chocolate chip cookies. This particular recipe is soft, gooey, and delicious! I found the original recipe on AllRecipes.com.

So here is my variation:

1 can of pumpkin
1 cup of sugar
1/2 cup vegetable oil
1 egg
2 cups of flour
2 tsp. baking powder
1 tsp. ground cinnamon
1/2 tsp. all spice
1/2 tsp. nutmeg
1 tsp. of milk
1 Tbsp. Vanilla
2 cups of semi sweet chocolate chips (I use Ghirardelli for mine, and Tollhouse for guests)
1/2 cup chopped nuts (optional)

Combine pumpkin, sugar, vegetable oil, and egg. In a separate bowl, stir together flour, baking powder, ground cinnamon, nutmeg, and allspice. Dissolve the baking soda with the milk and stir in. Add flour mixture to pumpkin mixture and mix well.

Add vanilla, chocolate chips, and nuts to the mix.

Drop spoonfuls onto cookie sheets and bake for 12 minutes at 350

20140220-002454.jpg

They are absolutely wonderful warm!

Popovers

I decided fairly recently, that it might be fun to actually try the recipes I have pinned on Pinterest. I thought it might also be nice to share my experiences with the ones I try.

This is not the first recipe I have tried, but this is the first one I will be sharing!

The original recipe came from this site:
tablefortwoblog.com

I modified to suite my own needs, and this is what I came up with:

1 cup of milk (I prefer 2%)
2 eggs
1 cup of flour
3 Tbsp of butter, divided
1/2 tsp salt (optional, I leave it out)

Preheat your oven to 450 degrees.

In a blender (or whisked by hande) combine the eggs and the milk, until well blended. Then add the flour and 1 Tbsp of the butter, melted. Blend until frothy and then let it set for 10 minutes.

Once the oven is up to temp, through a standard muffin tin into the oven for 2 minutes (before adding the mix).

After the 2 minutes is up, melt the last 2 Tbsps of butter and brush it into each section of the muffin.

Froth your mix one more time, pour it into your muffin tin, and place it in the oven.

You are going to bake them for 15 minutes, then you are going to reduce the temperature to 350 degrees. DO NOT open the oven during the temp,change, it will prevent them from popping over (and you don’t want that). You are going to leave it at 350 for 15 minutes as well.

When they are done, immediately remove them from the muffin tin to cool.

There you have it! They are great plain, buttered, or with jams!

Enjoy them while they are hot and fresh, they don’t make the best leftovers!

20140209-203815.jpg

Hello world!

Hey everyone, I’m Adrienne! I am a manager for a national retail chain that specializes in crafting, art, and framing. I have discovered a lot of new interests since working there, and am hoping to share some of that with all of you. They will either be artsy, crafty, or foodsy.

I’m hoping this blog will help fuel my creativity and motivate me to wander outside my normal boundaries and try new things. I will be sharing my failures and my successes (which I’m hoping will be the majority of my sharing experience).

Feel free to leave your feedback!